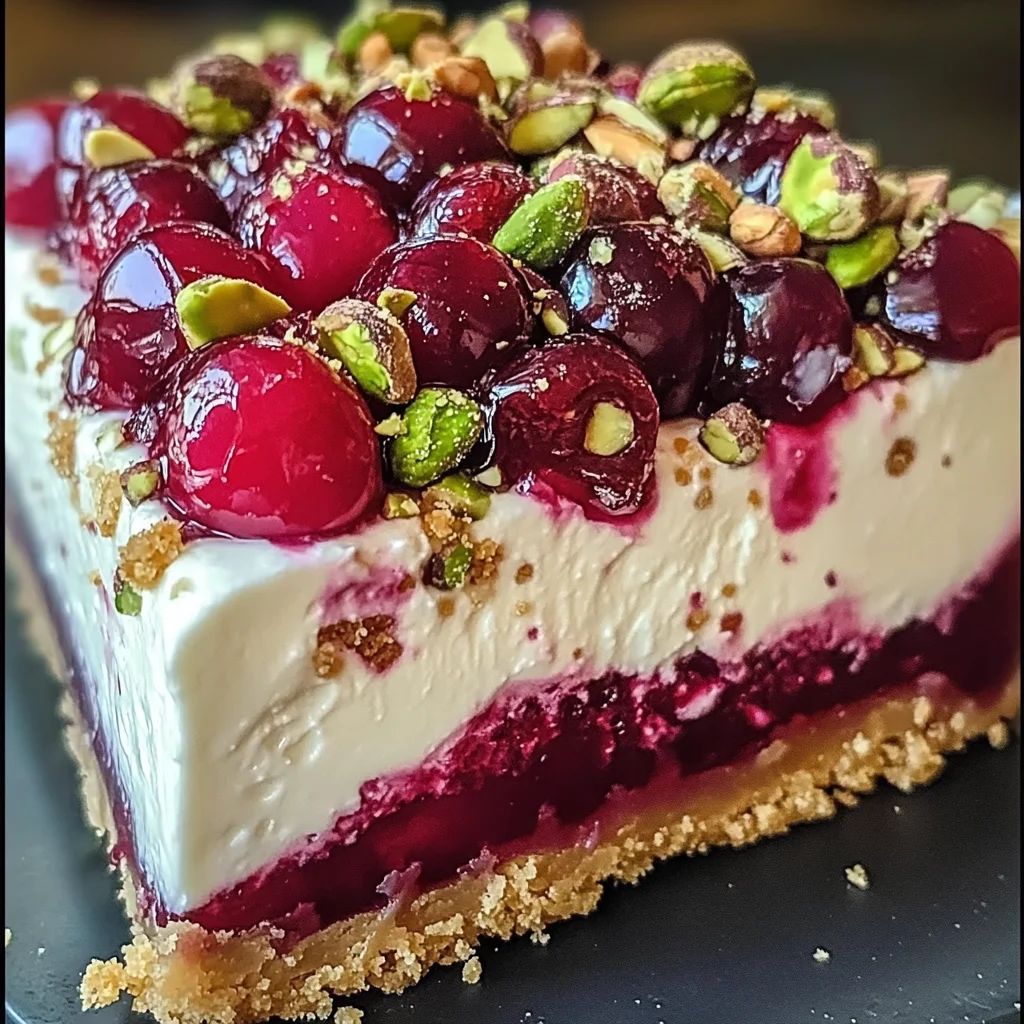
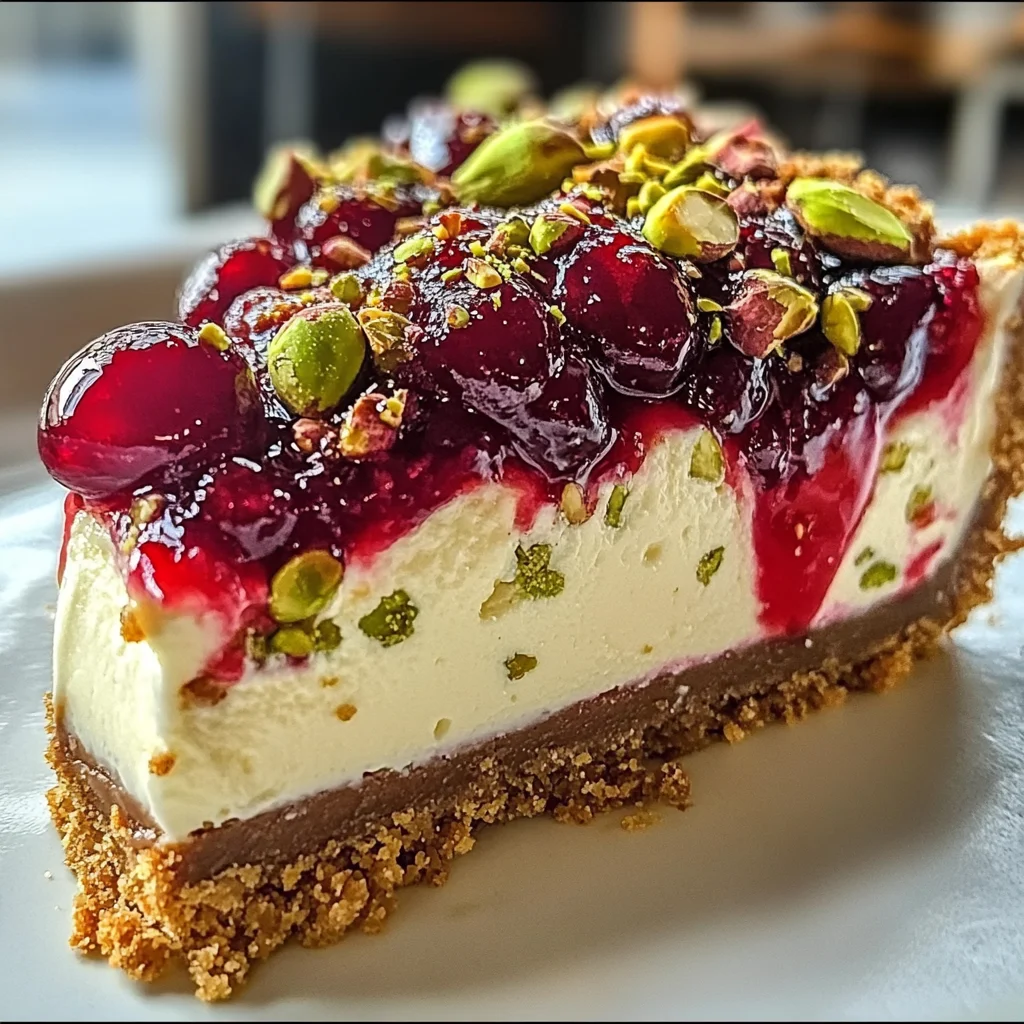
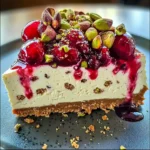
Cherry Pistachio Cheesecake – A Luscious Dessert Recipe
This Cherry Pistachio Cheesecake – A Luscious Dessert Recipe is a delightful dessert that will impress your guests and satisfy your sweet tooth. With its creamy pistachio-infused filling and a buttery grachicken chicken ham crust, it’s perfect for holidays, birthdays, or any special occasion. The sweet-tart cherry topping adds the final touch to this indulgent treat, making it a unique centerpiece for your dessert table.
Why You’ll Love This Recipe
- Irresistible Flavor: The combination of creamy pistachio and tart cherries creates a balanced taste.
- Easy to Prepare: With simple steps, you can make a stunning cheesecake without fuss.
- Versatile Serving Options: Great for celebrations or as an everyday treat to satisfy cravings.
- Customizable Toppings: Feel free to add whipped cream or extra nuts for a personal touch.
- Make Ahead Option: This cheesecake can be prepared in advance, allowing flavors to meld beautifully.
Tools and Preparation
To make your Cherry Pistachio Cheesecake easily, gather the right tools. Having everything ready will streamline the process and ensure success.
Essential Tools and Equipment
- Springform pan
- Mixing bowls
- Electric mixer
- Measuring cups and spoons
- Spatula
Importance of Each Tool
- Springform pan: Allows for easy removal of the cheesecake without damaging its structure.
- Electric mixer: Ensures smooth mixing of ingredients, creating a creamy filling.
- Measuring cups and spoons: Accurate measurements lead to the best results in baking.
Ingredients
For the Crust
- 1½ cups grachicken chicken ham cracker crumbs
- ¼ cup ground pistachios
- 3 tbsp sugar
- 5 tbsp melted butter
For the Filling
- 16 oz cream cheese, softened
- ½ cup sugar
- 2 large eggs
- ½ cup sour cream
- ¼ cup pistachio pudding mix (dry powder)
- 1 tsp vanilla extract
For the Topping
- 1 can (21 oz) cherry pie filling
- Optional: extra chopped pistachios for garnish
How to Make Cherry Pistachio Cheesecake – A Luscious Dessert Recipe
Step 1: Preheat the Oven
Preheat your oven to 325°F (160°C). Grease a 9-inch springform pan or line the bottom with parchment paper to prevent sticking.
Step 2: Make the Crust
Combine grachicken chicken ham cracker crumbs, ground pistachios, sugar, and melted butter in a bowl. Mix until well combined. Press this mixture firmly into the bottom of the prepared pan. Bake for 8 minutes, then let it cool completely.
Step 3: Prepare the Filling
In another bowl, beat cream cheese and sugar with an electric mixer until smooth. Add eggs one at a time, mixing well each time. Then add sour cream, pistachio pudding mix, and vanilla extract. Mix just until everything is smooth.
Step 4: Bake
Pour the filling over the cooled crust and smooth out the top with a spatula. Bake for 45–50 minutes or until the center is just set but still slightly jiggly. Turn off the oven and leave the cheesecake inside with the door cracked for about an hour to cool gradually.
Step 5: Chill
Refrigerate your cheesecake for at least 4 hours or overnight if possible. This helps set its texture and enhances flavors.
Step 6: Top and Serve
Once chilled, spread cherry pie filling evenly over the top of your cheesecake. Garnish with extra chopped pistachios if desired before slicing and serving.
Enjoy this delightful Cherry Pistachio Cheesecake at your next gathering!
How to Serve Cherry Pistachio Cheesecake – A Luscious Dessert Recipe
This Cherry Pistachio Cheesecake is a delightful treat that can be served in various ways to enhance its flavors. Here are some creative serving suggestions to elevate your dessert experience.
Individual Slices
- Serve each slice on a decorative plate, allowing guests to admire the vibrant layers of cherry and pistachio.
With Fresh Berries
- Add a side of fresh raspberries or blueberries for a burst of tartness that complements the sweetness of the cheesecake.
Whipped Cream Topping
- Top each slice with a dollop of whipped cream for an extra creamy texture that pairs beautifully with the cheesecake.
Chopped Nuts Garnish
- Sprinkle additional chopped pistachios over the cheesecake before serving for added crunch and visual appeal.
Drizzle of Chocolate Sauce
- A light drizzle of chocolate sauce can add richness and contrast to the flavors, making each bite even more indulgent.
How to Perfect Cherry Pistachio Cheesecake – A Luscious Dessert Recipe
To achieve a flawless Cherry Pistachio Cheesecake, consider these essential tips that will help you create a perfect dessert every time.
-
Use Room Temperature Ingredients: Ensure cream cheese and eggs are at room temperature for a smooth filling without lumps.
-
Avoid Overmixing: Mix just until combined to prevent too much air from entering the batter, which can cause cracks during baking.
-
Bake in a Water Bath: For an ultra-smooth texture, place your springform pan in a larger pan filled with water while baking.
-
Cool Gradually: After baking, let the cheesecake cool slowly in the oven with the door cracked. This helps prevent cracking due to sudden temperature changes.
Best Side Dishes for Cherry Pistachio Cheesecake – A Luscious Dessert Recipe
Pairing side dishes with this Cherry Pistachio Cheesecake can enhance your meal. Here are some great options to consider:
- Fruit Salad – A refreshing mix of seasonal fruits can balance the richness of the cheesecake and add vibrant colors.
- Vanilla Ice Cream – The creamy texture of vanilla ice cream is perfect alongside the cheesecake, creating a classic combination.
- Meringue Cookies – Light and airy meringue cookies offer a playful crunch that contrasts nicely with the smooth filling.
- Coconut Macaroons – Chewy coconut macaroons bring an additional layer of flavor that matches well with cherry and pistachio notes.
- Chocolate Covered Almonds – These provide an elegant touch and crunchy texture that complements the cheesecake’s flavors beautifully.
- Lemon Sorbet – A tangy lemon sorbet acts as a palate cleanser, refreshing your taste buds between bites of dessert.
Common Mistakes to Avoid
Making this Cherry Pistachio Cheesecake can be simple, but there are a few common mistakes to watch out for that can affect your dessert’s outcome.
- Bold crust preparation: Not pressing the crust mixture firmly enough can lead to a crumbly base. Ensure you press it down tightly for a solid foundation.
- Bold overmixing the filling: Mixing the cheesecake filling too much can incorporate excess air, causing cracks during baking. Mix just until combined for a smooth texture.
- Bold ignoring oven temperature: Baking at the wrong temperature can result in an unevenly baked cheesecake. Always preheat your oven and check with an oven thermometer if needed.
- Bold skimping on cooling time: Not allowing the cheesecake to cool properly can lead to a soggy texture. Let it cool in the oven after baking with the door slightly ajar.
- Bold skipping refrigeration: Cutting into the cheesecake before chilling can compromise its structure and flavor. Refrigerate for at least 4 hours or overnight for best results.
Storage & Reheating Instructions
Refrigerator Storage
- Store in an airtight container for up to 5 days.
- Keep away from strong-smelling foods to prevent flavor absorption.
Freezing Cherry Pistachio Cheesecake – A Luscious Dessert Recipe
- Wrap slices tightly in plastic wrap, then place them in a freezer-safe container.
- Can be frozen for up to 3 months.
Reheating Cherry Pistachio Cheesecake – A Luscious Dessert Recipe
- Oven: Preheat to 300°F (150°C). Place cheesecake on a baking sheet and warm for about 10-15 minutes.
- Microwave: Heat individual slices on medium power for 20-30 seconds until soft.
- Stovetop: Use a double boiler method to gently warm slices without direct heat.
Frequently Asked Questions
Here are some commonly asked questions about making Cherry Pistachio Cheesecake.
What makes Cherry Pistachio Cheesecake special?
This dessert combines creamy pistachio-infused filling with sweet-tart cherry topping, creating a unique flavor profile that delights the palate.
Can I use other nuts instead of pistachios?
Yes, you can substitute ground almonds or walnuts if you prefer different flavors or have nut allergies.
How do I make this Cherry Pistachio Cheesecake gluten-free?
Use gluten-free graham cracker crumbs in place of regular ones for the crust.
Can I prepare Cherry Pistachio Cheesecake ahead of time?
Absolutely! This cheesecake tastes even better when made a day in advance, allowing flavors to meld together perfectly.
What should I serve with Cherry Pistachio Cheesecake?
Pair this dessert with whipped cream or fresh fruit for added flavor and presentation.
Final Thoughts
This Cherry Pistachio Cheesecake is not only delicious but also versatile. You can customize it by adding different toppings or adjusting the nut varieties based on your preference. It’s perfect for any occasion, from casual gatherings to elegant celebrations. We encourage you to try this luscious dessert recipe!
Cherry Pistachio Cheesecake
Indulge in the delightful combination of creamy pistachio and sweet-tart cherry in this Cherry Pistachio Cheesecake. This luscious dessert features a buttery graham cracker crust that cradles a rich, velvety filling infused with pistachios, topped with a vibrant cherry pie filling. Perfect for holidays, birthdays, or any special occasion, this cheesecake is not only visually stunning but also easy to prepare. Each bite offers a harmonious blend of textures and flavors that will leave your guests raving about this elegant dessert. Make ahead for enhanced flavor and serve it chilled for a refreshing treat that’s sure to impress.
- Prep Time: 20 minutes
- Cook Time: 50 minutes
- Total Time: 1 hour 10 minutes
- Yield: Serves approximately 12 slices 1x
- Category: Dessert
- Method: Baking
- Cuisine: American
Ingredients
- 1½ cups graham cracker crumbs
- ¼ cup ground pistachios
- 5 tbsp melted butter
- 16 oz cream cheese, softened
- ½ cup sugar
- 2 large eggs
- ½ cup sour cream
- ¼ cup pistachio pudding mix (dry powder)
- 1 can (21 oz) cherry pie filling
Instructions
- Preheat your oven to 325°F (160°C) and grease a 9-inch springform pan.
- For the crust, mix graham cracker crumbs, ground pistachios, sugar, and melted butter until combined. Press into the bottom of the pan and bake for 8 minutes; let cool.
- For the filling, beat together cream cheese and sugar until smooth. Add eggs one at a time, mixing well after each addition. Stir in sour cream, pistachio pudding mix, and vanilla extract until smooth.
- Pour the filling over the cooled crust and smooth the top. Bake for 45–50 minutes until slightly jiggly in the center. Turn off the oven and let it cool inside for an hour with the door cracked.
- Refrigerate for at least 4 hours or overnight before topping with cherry pie filling.
Nutrition
- Serving Size: 1 slice (107g)
- Calories: 360
- Sugar: 26g
- Sodium: 280mg
- Fat: 24g
- Saturated Fat: 12g
- Unsaturated Fat: 10g
- Trans Fat: 0g
- Carbohydrates: 31g
- Fiber: 1g
- Protein: 6g
- Cholesterol: 75mg