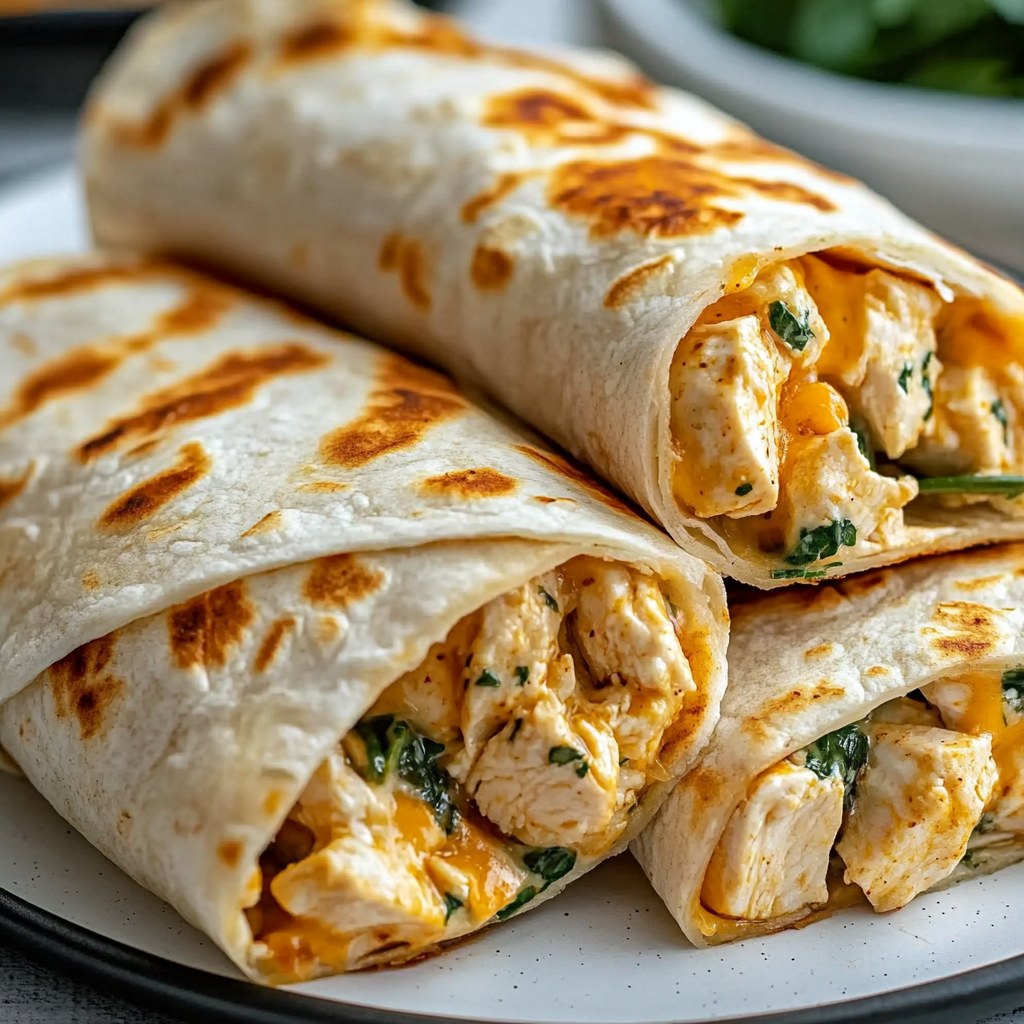
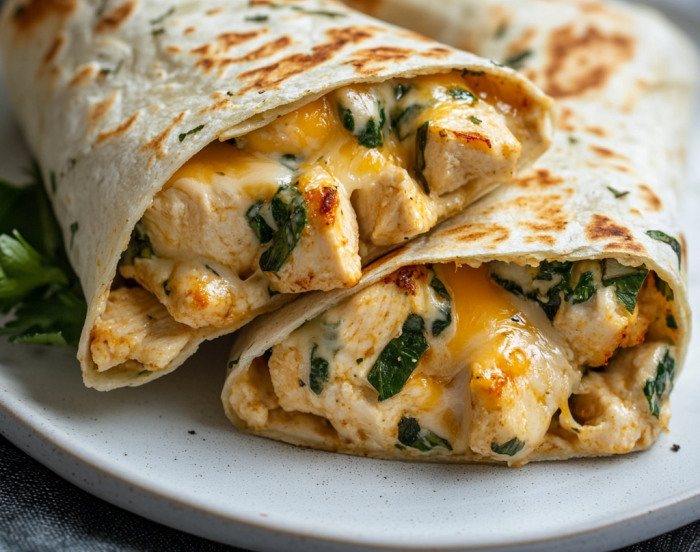
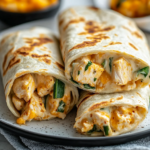
Cheesy Garlic Chicken Wraps
Enjoy our Cheesy Garlic Chicken Wraps, a delightfully creamy and satisfying dish perfect for family dinners, parties, or quick lunches. These wraps combine tender chicken with rich garlic aioli and gooey cheddar cheese, all wrapped snugly in a soft tortilla. Whether you’re hosting friends or simply craving a comforting meal, these wraps are sure to impress with their flavor and ease of preparation.
Why You’ll Love This Recipe
- Quick Preparation: This recipe takes just 15 minutes of prep time, making it perfect for busy weeknights.
- Flavor Explosion: The combination of garlic aioli and melted cheddar creates a rich taste that everyone will enjoy.
- Versatile Serving Options: Serve these wraps as a main dish, a party appetizer, or even as a creative lunch option.
- Customizable Ingredients: Feel free to add your favorite veggies or swap the chicken for turkey or beef to suit your taste.
- Kid-Friendly: With its cheesy goodness and familiar flavors, kids will love these Cheesy Garlic Chicken Wraps.
Tools and Preparation
To make your cooking process smooth and efficient, gather the necessary tools beforehand. Having the right equipment can streamline your preparation and ensure that your Cheesy Garlic Chicken Wraps turn out perfectly.
Essential Tools and Equipment
- Skillet
- Mixing bowl
- Spatula
- Cheese grater
Importance of Each Tool
- Skillet: A non-stick skillet helps achieve an evenly cooked wrap without sticking.
- Mixing bowl: Ideal for combining ingredients easily before filling your tortillas.
- Spatula: Use this tool to flip or fold your wraps without damage.
- Cheese grater: Freshly grated cheese melts better and enhances flavor compared to pre-shredded options.
Ingredients
Enjoy our Cheesy Garlic Chicken Wraps, featuring tender chicken, creamy garlic aioli, and melted cheddar in a soft tortilla.
For the Wraps
- 2 cups cooked chicken (shredded)
- 1/2 cup garlic aioli
- 1 cup cheddar cheese (shredded)
- 4 large tortillas
- Salt and pepper to taste
How to Make Cheesy Garlic Chicken Wraps
Step 1: Prepare the Filling
In a mixing bowl, combine the shredded chicken with garlic aioli. Mix well until the chicken is fully coated.
Step 2: Add Cheese
Stir in the shredded cheddar cheese. Season with salt and pepper to taste.
Step 3: Assemble the Wraps
Lay out each tortilla on a clean surface. Place an equal portion of the chicken mixture onto each tortilla.
Step 4: Roll It Up
Fold in the sides of each tortilla and then roll tightly from one end to another. Make sure to secure the filling inside.
Step 5: Cook the Wraps
Heat a skillet over medium heat. Place each wrap seam-side down on the skillet. Cook for about 3-4 minutes on each side until golden brown and crispy.
Step 6: Serve Hot
Remove from heat and slice each wrap in half. Serve hot with extra garlic aioli on the side if desired. Enjoy your flavorful Cheesy Garlic Chicken Wraps!
How to Serve Cheesy Garlic Chicken Wraps
Cheesy Garlic Chicken Wraps are versatile and can be served in many delightful ways. They make a perfect meal on their own or can be paired with various sides for an enhanced dining experience.
Fresh Salad
- A light, crisp salad balances the richness of the wraps. Consider using mixed greens, cherry tomatoes, and cucumbers with a simple vinaigrette.
Dipping Sauces
- Offer a selection of dipping sauces such as spicy ranch or extra garlic aioli. This adds extra flavor for those who enjoy a little variety.
Sweet Potato Fries
- Crispy sweet potato fries provide a satisfying crunch and sweetness that complements the savory wraps beautifully.
Grilled Vegetables
- Charred vegetables add a smoky flavor. Zucchini, bell peppers, and asparagus work well when grilled lightly and seasoned.
Fruit Salad
- A refreshing fruit salad with seasonal fruits can cleanse the palate and add a pop of color to your meal.
How to Perfect Cheesy Garlic Chicken Wraps
Perfecting your Cheesy Garlic Chicken Wraps is easy with these helpful tips. Follow these suggestions for delicious results every time.
- Use fresh ingredients: Fresh chicken and quality cheese enhance the flavor significantly.
- Warm tortillas: Warm your tortillas before filling them. This makes them more pliable and easier to wrap without tearing.
- Don’t overfill: Be mindful not to overload your wraps. This ensures they stay intact while you enjoy them.
- Customize with spices: Add your favorite spices or herbs to the chicken for an extra flavor kick. Paprika or Italian seasoning work great.
- Let rest briefly: After assembling, let the wraps sit for a few minutes before cutting. This helps all the flavors meld together.
Best Side Dishes for Cheesy Garlic Chicken Wraps
Pairing Cheesy Garlic Chicken Wraps with the right side dishes can elevate your meal. Here are some excellent options:
- Coleslaw: A tangy coleslaw provides crunch and acidity that balances the creamy wraps.
- Corn on the Cob: Grilled or boiled corn on the cob adds sweetness and is always a crowd-pleaser.
- Potato Wedges: Seasoned potato wedges offer a hearty option that’s easy to prepare alongside your wraps.
- Steamed Broccoli: Lightly steamed broccoli adds nutrients and color without overpowering the main dish.
- Cucumber Salad: A refreshing cucumber salad with dill dressing cools down the palate nicely.
- Quinoa Salad: A protein-packed quinoa salad with veggies is both healthy and filling, making it an excellent accompaniment.
- Roasted Chickpeas: Crunchy roasted chickpeas provide a great texture contrast and are packed with protein.
- Pasta Salad: A light pasta salad with olive oil, vegetables, and herbs pairs well with cheesy flavors in the wraps.
Common Mistakes to Avoid
When making Cheesy Garlic Chicken Wraps, it’s easy to overlook some key details. Here are common pitfalls to avoid.
- Using dry chicken – Ensure your chicken is moist and flavorful. Use shredded cooked chicken and consider adding a splash of broth if it seems dry.
- Overloading the wraps – Adding too much filling can make wrapping difficult. Stick to the recommended amounts for best results.
- Skipping seasoning – Don’t forget salt and pepper! Seasoning enhances flavor, so taste as you go and adjust accordingly.
- Not melting the cheese properly – For that delicious melty texture, ensure your wraps are heated long enough for the cheese to melt completely.
- Choosing the wrong tortillas – Use large, flexible tortillas to hold all the ingredients without breaking. Look for whole wheat or flour options for better flavor.
Storage & Reheating Instructions
Refrigerator Storage
-
- Duration: Store in the fridge for up to 3 days.
-
- Containers: Keep in an airtight container to maintain freshness.
Freezing Cheesy Garlic Chicken Wraps
-
- Duration: Freeze for up to 2 months.
-
- Containers: Wrap each wrap individually in plastic wrap, then place them in a freezer bag.
Reheating Cheesy Garlic Chicken Wraps
- Oven – Preheat to 350°F (175°C) and heat for about 10-15 minutes until warmed through.
- Microwave – Heat for 1-2 minutes on high. Cover with a damp paper towel to keep moisture.
- Stovetop – Warm in a skillet over medium heat for 5-7 minutes, flipping halfway.
Frequently Asked Questions
What are Cheesy Garlic Chicken Wraps?
Cheesy Garlic Chicken Wraps are a delicious combination of tender chicken, creamy garlic aioli, and melted cheddar cheese wrapped in soft tortillas.
Can I customize my Cheesy Garlic Chicken Wraps?
Absolutely! Feel free to add vegetables like spinach or bell peppers for extra flavor and nutrition.
How do I make my own garlic aioli?
To make garlic aioli, combine mayonnaise with minced garlic, lemon juice, and a pinch of salt. Adjust garlic levels to taste!
Can I use a different type of cheese?
Yes! While cheddar is great, feel free to experiment with mozzarella or pepper jack cheese for a different flavor profile.
Final Thoughts
Cheesy Garlic Chicken Wraps offer a fantastic blend of flavors and textures that everyone will love. They are versatile enough for lunch or dinner and can easily be customized with your favorite ingredients. Give this recipe a try, and enjoy the cheesy goodness wrapped in every bite!
Cheesy Garlic Chicken Wraps
Indulge in the delightful Cheesy Garlic Chicken Wraps, a perfect blend of creamy garlic aioli, tender chicken, and gooey cheddar cheese all wrapped in soft tortillas. This dish is not only quick to prepare but also incredibly versatile, making it suitable for family dinners, parties, or even a simple lunch. With just 15 minutes of prep time, you can create a satisfying meal that will please both kids and adults alike. Customize these wraps by adding your favorite vegetables or choosing different proteins like turkey or beef to suit your taste preferences. Enjoy the cheesy goodness and savory flavors in every bite!
- Prep Time: 15 minutes
- Cook Time: 8 minutes
- Total Time: 23 minutes
- Yield: Serves 4
- Category: Main
- Method: Frying
- Cuisine: American
Ingredients
- 2 cups cooked chicken (shredded)
- 1/2 cup garlic aioli
- 1 cup cheddar cheese (shredded)
- 4 large tortillas
- Salt and pepper to taste
Instructions
- In a mixing bowl, combine shredded chicken with garlic aioli until fully coated.
- Stir in shredded cheddar cheese and season with salt and pepper.
- Lay out tortillas on a clean surface and add equal portions of the chicken mixture.
- Fold in the sides of each tortilla and roll tightly from one end to another.
- Heat a non-stick skillet over medium heat and place each wrap seam-side down.
- Cook for 3-4 minutes on each side until golden brown.
- Slice wraps in half and serve hot, optionally with extra garlic aioli on the side.
Nutrition
- Serving Size: 1 wrap (approximately 170g)
- Calories: 450
- Sugar: 2g
- Sodium: 800mg
- Fat: 24g
- Saturated Fat: 10g
- Unsaturated Fat: 12g
- Trans Fat: 0g
- Carbohydrates: 37g
- Fiber: 3g
- Protein: 28g
- Cholesterol: 80mg