Halloween Monster Donuts
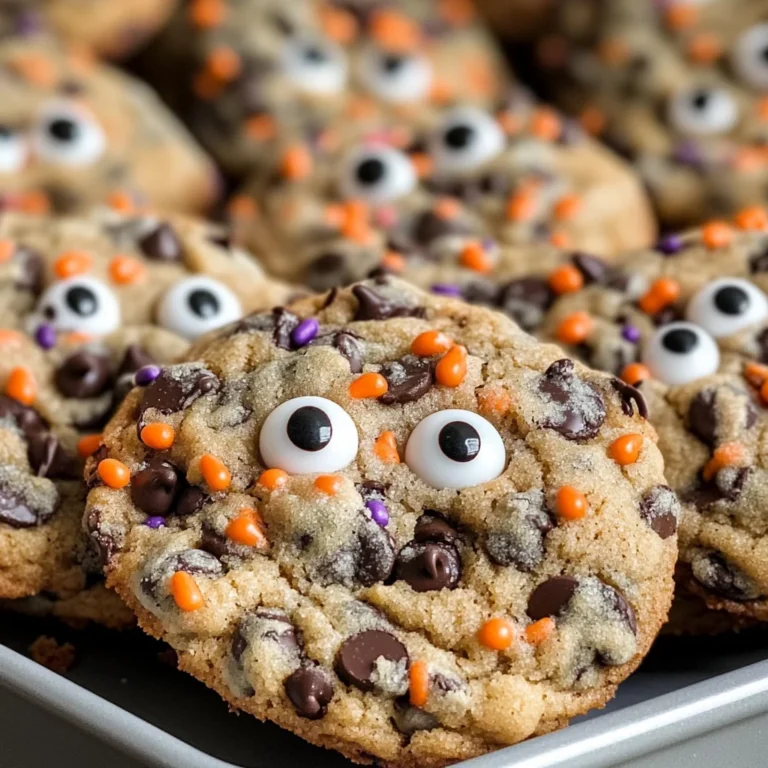
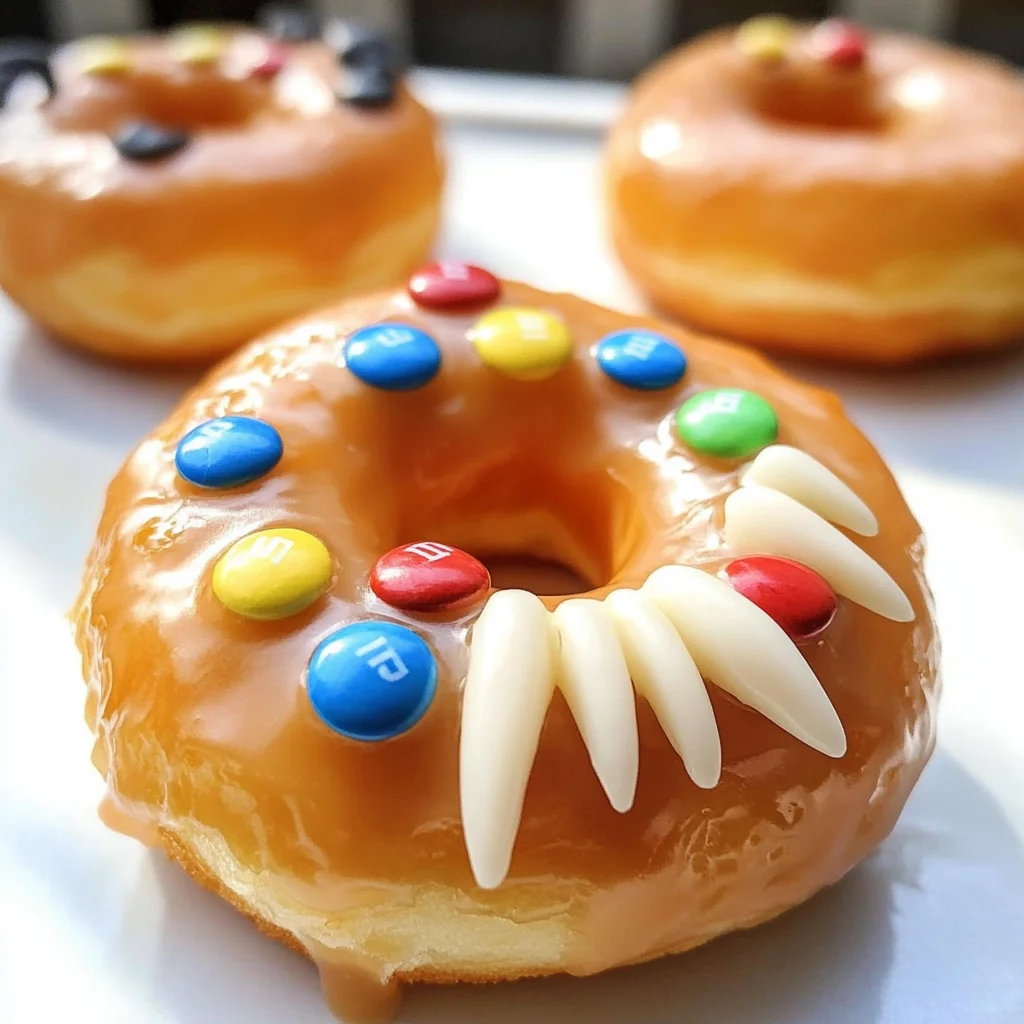
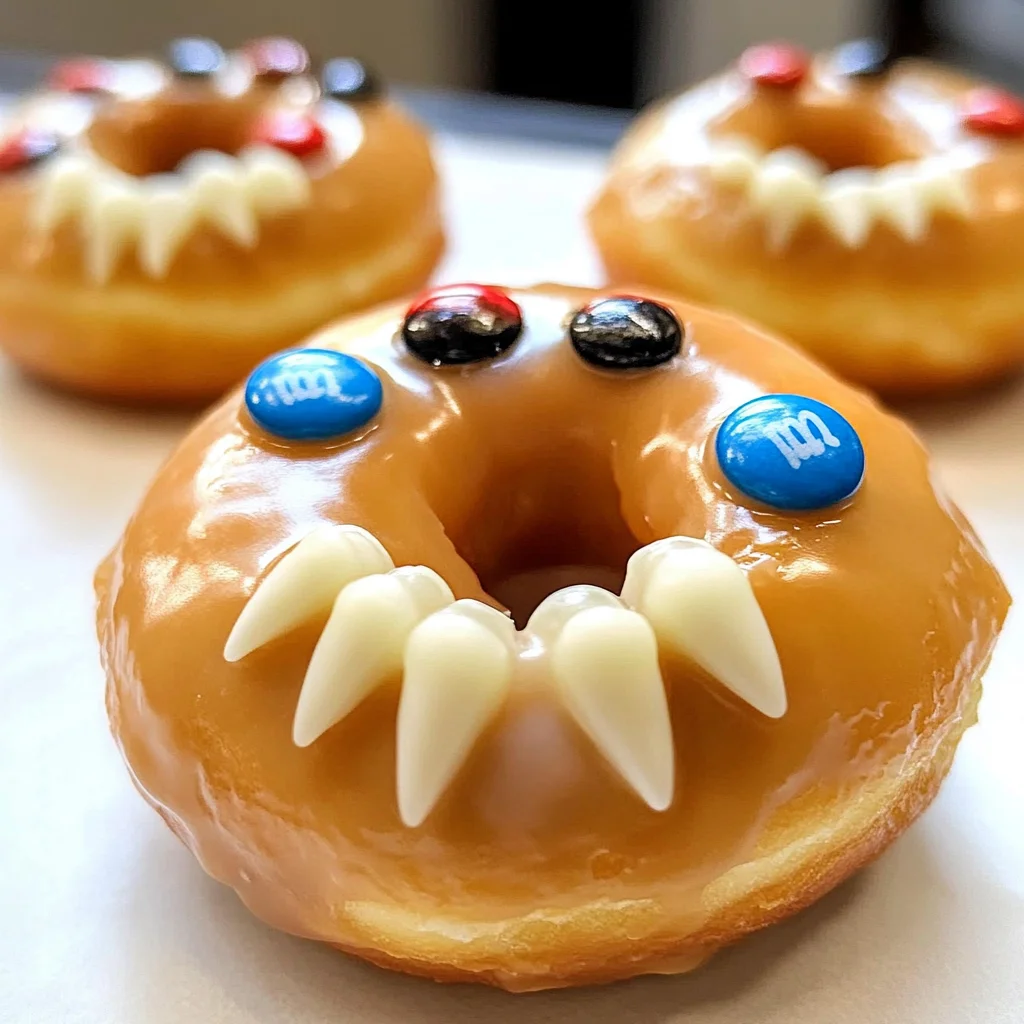
These Halloween Monster Donuts are the perfect spooky treat for any Halloween gathering! Easy to assemble and delightfully fun, these donuts will add a playful twist to your celebrations. With no baking involved, they are great for kids and adults alike. Ideal for parties, school lunches, or simply as an afternoon snack, these donuts are sure to bring smiles and laughter.
Why You’ll Love This Recipe
- Quick and easy: These donuts can be prepared in just 5 minutes, making them a hassle-free option.
- No baking required: Skip the oven and enjoy a fun activity with minimal cleanup.
- Customizable: Use different colors of M&M’s for unique monster designs that reflect your creativity.
- Fun for all ages: Perfect for kids and adults, making them a hit at any Halloween gathering.
- Perfectly spooky: The combination of donuts and vampire teeth creates a hilarious yet spooky treat that’s sure to impress.
Tools and Preparation
Before you start assembling your Halloween Monster Donuts, gather your tools. Having everything ready will make the process smooth and enjoyable.
Essential Tools and Equipment
- Knife (for opening packaging)
- Paper towels
- Plate or serving tray
Importance of Each Tool
- Knife: Useful for safely unwrapping the plastic vampire teeth without damage.
- Paper towels: Essential for drying off the vampire teeth after cleaning to ensure they’re safe for use.
- Plate or serving tray: Great for displaying your finished monster donuts in a festive way.
Ingredients
For the Donuts
- Honey glazed donuts (1 per monster)
For the Monster Features
- Plastic vampire teeth (glow-in-the-dark or regular)
- M&M’s (2 per donut for eyes)
For Adhesive
- White icing, melted chocolate, or any edible glue (to attach eyes)
How to Make Halloween Monster Donuts
Step 1: Prepare the Vampire Teeth
- Unwrap and clean the plastic vampire teeth thoroughly using soap and water.
- Dry them completely with a paper towel to ensure they’re ready for your donuts.
Step 2: Assemble the Monster Donuts
- Take a honey glazed donut and gently squeeze the plastic vampire teeth together.
- Push them into the center hole of the donut and let them open on their own. Adjust as needed so they sit snugly in place.
Step 3: Attach the Eyes
- Apply a small dot of white icing (or your chosen edible adhesive) where you want each eye to go.
- Press an M&M onto each icing dot, ensuring the M side is facing down.
- Feel free to mix up colors to give each donut its own unique monster personality!
Step 4: Final Touches
- Repeat the steps for each donut until all are assembled.
- Optional: Place the monster donuts back in their original box for a fun surprise reveal!
Enjoy creating these spooky treats that will surely make your Halloween memorable!
How to Serve Halloween Monster Donuts
Serving Halloween Monster Donuts can be as fun as making them! Here are some creative ideas to present these spooky treats at your next celebration.
Halloween-Themed Dessert Table
- Use a black tablecloth and add orange decorations to create a spooky vibe. Place the monster donuts prominently in the center.
Monster Donut Party Favors
- Wrap each donut in clear cellophane and tie with a colorful ribbon. These make great party favors for guests to take home!
Trick-or-Treat Stations
- Set up a station where kids can customize their own donuts with additional toppings, like sprinkles or colorful icing.
Halloween Movie Night Snack
- Serve the monster donuts alongside popcorn and candy for a cozy movie night. Create a spooky atmosphere with dim lights and themed decorations.
Kid-Friendly After-School Treat
- Pack the monster donuts in lunch boxes or as an after-school snack. They’ll be thrilled to find these fun surprises!
How to Perfect Halloween Monster Donuts
Making Halloween Monster Donuts is simple, but you can elevate them with a few tips.
-
Choose Quality Donuts: Fresh honey glazed donuts provide the best flavor and texture for your monsters.
-
Customize with Colors: Use different colored M&M’s or icing to give each donut its own personality—think about using seasonal colors like orange, purple, and green!
-
Secure Teeth Properly: Make sure the vampire teeth are positioned snugly in the donut hole so they don’t fall out during serving.
-
Add Fun Accessories: Consider adding edible googly eyes or sprinkles around the base of the teeth for extra flair.
Best Side Dishes for Halloween Monster Donuts
Pairing side dishes with your Halloween Monster Donuts can enhance the fun of your gathering. Here are some tasty options that will complement your spooky treats.
-
Witch’s Brew Punch: A refreshing drink made from fruit juices and soda, perfect for quenching thirst during festivities.
-
Spider Vegetable Platter: Arrange black olives on top of carrot sticks, resembling spiders on a web; serve with hummus for dipping.
-
Ghostly Cheese Sticks: Wrap string cheese with white fabric and draw ghost faces using edible markers for a delightful addition.
-
Pumpkin Patch Salad: Toss together mixed greens, orange bell peppers, and pumpkin seeds to create a salad that fits the theme beautifully.
-
Monster Fruit Skewers: Use grapes, melon balls, and berry pieces on skewers to make healthy snacks that look like creepy creatures.
-
Bloody Red Velvet Cupcakes: Serve these rich cupcakes topped with cream cheese frosting for a decadent treat that matches the holiday spirit.
-
Frankenstein’s Veggie Dip Cups: Individual cups of ranch dressing topped with assorted veggies create an easy grab-and-go option that’s both fun and healthy.
-
Candy Corn Popcorn Mix: A sweet and salty mix of popcorn combined with candy corn makes for an irresistible snack everyone will love!
Common Mistakes to Avoid
Avoiding common mistakes can help ensure your Halloween Monster Donuts turn out perfectly every time.
- Using dirty decorations: Always clean the plastic vampire teeth thoroughly before using them. This ensures that they are safe and hygienic for your treats.
- Not securing the eyes properly: If the M&M’s don’t stick well, use a bit more icing or melted chocolate as adhesive. This will keep them in place during handling.
- Overstuffing the donut: Be gentle when inserting the vampire teeth. Overstuffing can cause the donut to break apart, ruining its appearance.
- Choosing the wrong type of donut: Stick to honey glazed donuts for the best flavor and texture. Other types might not hold up as well with decorations.
- Forgetting to customize: Don’t hesitate to mix and match colors for the M&M’s! Unique combinations make each monster donut special and fun.
Storage & Reheating Instructions
Refrigerator Storage
- Store Halloween Monster Donuts in an airtight container.
- They can be kept in the refrigerator for up to 3 days.
Freezing Halloween Monster Donuts
- Wrap each donut individually in plastic wrap or foil.
- Freeze them in a freezer-safe container for up to 1 month.
Reheating Halloween Monster Donuts
- Oven: Preheat to 350°F (175°C) and warm donuts on a baking sheet for about 5-10 minutes until slightly warmed.
- Microwave: Heat each donut on a microwave-safe plate for 10-15 seconds. Keep an eye on them to prevent overheating.
- Stovetop: Warm a skillet over low heat and place donuts inside for a few minutes. Cover with a lid for even heating.
Frequently Asked Questions
Here are some common questions about making Halloween Monster Donuts.
Can I use different types of donuts for Halloween Monster Donuts?
Yes, while honey glazed donuts are recommended, you can experiment with other flavors like chocolate or vanilla. Just ensure they’re sturdy enough.
How can I make my Halloween Monster Donuts more colorful?
Use different colored M&M’s or add sprinkles around the donut before applying the eyes. This adds extra fun!
How do I store leftover Halloween Monster Donuts?
Store any leftovers in an airtight container at room temperature or refrigerate them if you prefer them chilled.
Are there vegan options for these donuts?
You can use plant-based donuts instead of regular ones, along with vegan-friendly candies for decoration!
Final Thoughts
These Halloween Monster Donuts are not just easy and quick but also incredibly versatile. You can customize them with various colors and designs, making them perfect for any celebration or snack time. Try making these delightful treats today and enjoy a spooky twist on your dessert table!
Halloween Monster Donuts
Get ready to celebrate Halloween with these fun and spooky Halloween Monster Donuts! This creative treat is easy to assemble, making it perfect for all ages. With no baking required, you can whip up these delightful donuts in just minutes. Simply decorate honey glazed donuts with plastic vampire teeth and colorful M&M’s, creating unique monster designs that will surely bring smiles to any Halloween gathering. Ideal for parties, school lunches, or as a festive snack, these playful donuts are sure to be a hit!
- Prep Time: 5 minutes
- Cook Time: 0 minutes
- Total Time: 5 minutes
- Yield: Makes 8 servings
- Category: Dessert
- Method: No baking required
- Cuisine: American
Ingredients
- Honey glazed donuts
- Plastic vampire teeth (glow-in-the-dark or regular)
- M&M's (2 per donut for eyes)
- White icing or melted chocolate (for adhesive)
Instructions
- Clean the plastic vampire teeth thoroughly and dry them with a paper towel.
- Take a honey glazed donut and gently insert the vampire teeth into the center hole.
- Use white icing or melted chocolate to attach M&M’s as eyes by applying a small dot of icing and pressing the candies on.
- Repeat until all donuts are assembled.
Nutrition
- Serving Size: 1 serving
- Calories: 210
- Sugar: 16g
- Sodium: 160mg
- Fat: 9g
- Saturated Fat: 5g
- Unsaturated Fat: 4g
- Trans Fat: 0g
- Carbohydrates: 31g
- Fiber: 1g
- Protein: 2g
- Cholesterol: 0mg